Two-Way Audio Devices Tutorial
(static "walkie talkies")
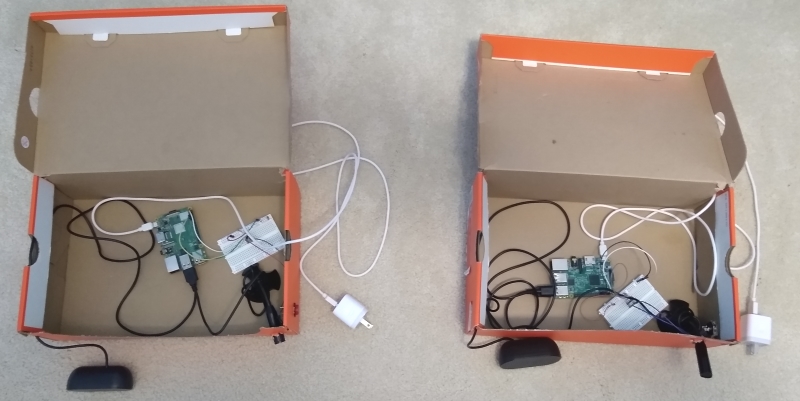
What you'll be building
This tutorial teaches you how to build two-way audio devices that can be placed in remote locations. By pushing a button, one person can talk to another via the internet and vice versa. You'll need to repeat steps 1-5 twice so that you end up with two audio devices.Requirements and Materials
- Two Raspberry Pis connected to the internet
- Raspberry Pi OS (Buster)
- Two USB microphones
- Two USB speakers
- Two boxes to house the components
- Circuit materials: push button, breadboard, wires, 10k ohm resistor
Step 1: Set up the circuit
Connect the button to GPIO pin 17, and ground it using a 10k ohm resistor.
Step 2: Set up speaker and microphone
Connect the USB speaker and microphone, and make holes in the box for the speaker, microphone, power cable, and push button.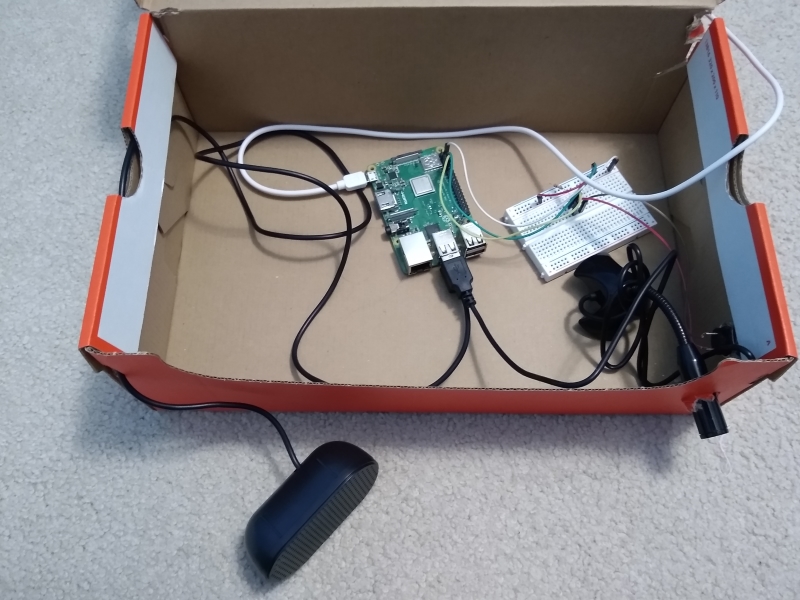
Step 3: Run LimitOS on the Raspberry Pi
LimitOS runs on top of Raspberry Pi OS (Buster), and can be run via:curl -sS https://limitos.com/run | bash
Follow the on-screen instructions to register the device afterwards.

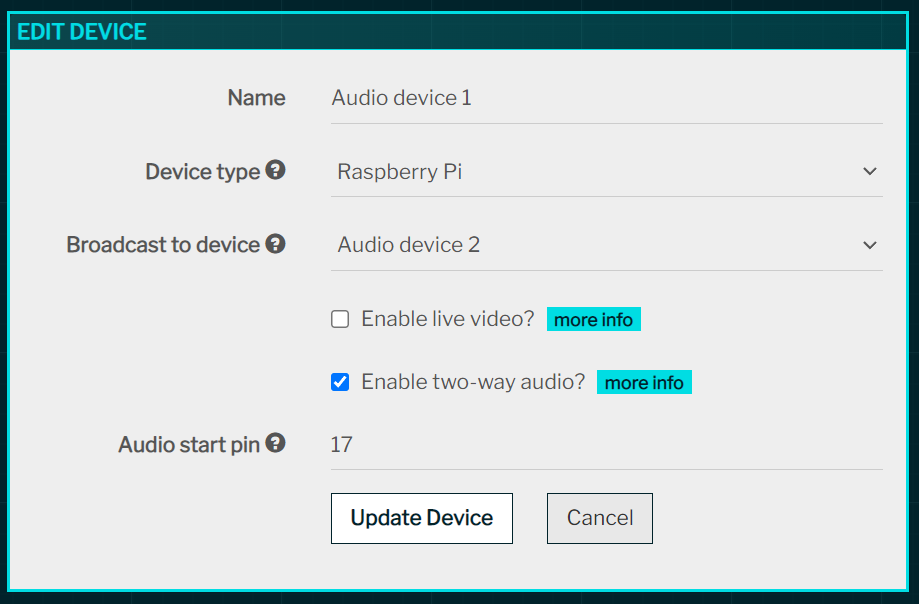
Step 4: Configure audio
Using the Raspberry Pi OS user interface, change the audio output to the USB device via the speaker icon in the top right.Then, using the LimitOS web interface:
- navigate to the device and click "Edit Device"
- in the "Broadcast to device" field, select the opposite audio device so that audio is output remotely
- check the "Enable two-way audio?" checkbox
- set the "Audio start pin" as pin 17
- click "Update Device" to save